🛁 Secure your space with style and strength!
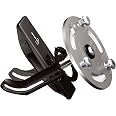
The Moen Chrome Home Care SecureMount Anchor (SMA1005CH) is a precision-engineered metal anchor designed for easy, stud-free installation of bathroom grab bars. Supporting up to 300 lbs, it features a sleek chrome finish and comes with a limited lifetime warranty, ensuring both safety and style in your home.


| Brand | Moen |
| Material | Metal |
| Color | Chrome |
| Item Weight | 136 Grams |
| Style | Transitional |
| Finish Type | Chrome |
| Global Trade Identification Number | 00034584017628 |
| Manufacturer | Moen Incorporated |
| UPC | 034584017628 |
| Part Number | SMA1005CH |
| Item Weight | 4.8 ounces |
| Product Dimensions | 7 x 2 x 9 inches |
| Country of Origin | Taiwan |
| Item model number | SMA1005CH |
| Is Discontinued By Manufacturer | No |
| Size | 1 Count (Pack of 1) |
| Finish | Chrome |
| Item Package Quantity | 1 |
| Number of Handles | 1 |
| Mounting Type | Wall |
| Included Components | Anchor |
| Batteries Included? | No |
| Batteries Required? | No |
| Warranty Description | Limited Lifetime Warranty |
D**N
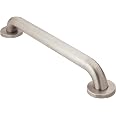
Nice mount for grab bar
Installed successfully in a wall that had the required void in the wall, I think 3.5 inches. When installed, the grab bar felt sturdy enough. The only problem was the the holes in the grab. bar did not match the holes in the mounting plate.. I doubt know which was wrong, the grab bar or this item but it needed some enlarged holes in the grab bar so the screws holes would match up.
J**R
Takes practice to use, but works sell.
This product does work well for installations with no wall studs available. The item takes a lot of study and skill to install. I studied and practiced for several hours, pieces falling all over the place before being able to install the first mount. After that the second mount was easy and quick. Well worth the effort. My age is 86 years and I still managed. My wife has a very bad knee and arthritis. Says the safety bar is a life saver.
D**S
Make sure you measure
Wow, takes a very good drill and diamond bit if your a DYI you must you must make sure your depth of the drywall and tile….The product works as intended, but may take a bit of work getting it into hole drilled.
V**T
Metric screws, M5-.80x10
I got 2 of the Moem Securemounts to install a chrome grab bar from Delta on a wall between studs. The Moem mounts have a flat aluminum plate that’s threaded to accept the supplied truss head machine screws. However, the mounting flange on the Delta grab bar is fairly thick with countersinks on the mounting holes meant for flathead screws, so the heads of the screws supplied with the Moem mounts protruded from the surface of the flanges. Even without using the supplied split ring washers the covers on the Delta bar stood about 1/8” away from the wall this way. I took one of the screws to Lowe’s and matched it up with a screw gage they had there, and they’re metric, M5-.80. Fortunately they had a pack of M5-.80x10 oval head screws, Hillman brand, that worked much better for my application. Now the covers for my Delta grab bar fit much closer to the wall than before with just a tiny air gap. I hope this is helpful for others who may need different screws than the ones that come with the Moem Securemounts. The mounts work perfectly and were easy to install.
B**B
Strong & secure. Hole saw bit needs drywall to engage. Updated remove to reuse info
Strong, smart, but have to be precise if using on both ends of the bar. Only item to be sure to have is a 1 1/4" hole saw bit. These are inexpensive, fit on any drill and usually come in a pack of assorted sizes.Used these the first time when installing the Moen toilet tissue/grab bar because these mounts came with that item - - easy peasy piece of cake.Later, I purchased the coordinating Moen towel/grab bar to replace an existing normal towel bar. I wanted this new bar to be installed in the exact same spot (in drywall) of the old towel bar so I wouldn't have a bunch of holes to patch. I purchased these mounts as an add on to give support as I knew I wouldn't be screwing into a stud.Important to keep in mind is if you want (as I did) to install in the same location as a previous bar, this means you will have the existing (smaller) holes in the drywall where the old bar bracket came off. This creates a problem when using your drill and the 1 1/4" hole saw. These hole saws are meant to hold themselves centered using a center drill bit, and make the larger hole relative to this center point.Because you already have an existing center point hole, there is nothing for the hole saw bit to hold onto and keep centered. I ended up taking the hole saw bit off the drill, and used a rubber mallet to pound it into the drywall deep enough so the teeth left an impression in the drywall and the hole saw bit would have something to grab onto.I needed the bar to be precisely in the same location because it was centered under a window. If this was not the situation and I could mount it give or take an inch or two, I would have placed the center bit just a 1/2" left or right of my existing holes. The 1 1/4" hole would encompass the old screw holes and the hole saw bit would still have "new" drywall" to drill through.A little more work and frustration this second time around, but the clean look and strength of these mounts make it worth it.* * update info on how to remove these mounts- Renovation of this bathroom meant that I was also changing out these grab bars for another style.My brother wanted to re-use these Moens for his bathroom so we commenced on figuring out how to remove them and keep them intact so they could be reused.We could find tons of YouTube videos on how to install, but nothing on how to remove, so here's that info for anyone who might wish to do so.Unscrew and remove the grab bars. Prying off the cover plates took a bit of delicate work with the edge of a small flat screwdriver. You need an allen wrench to loosen the bar from the mount.Once the grab bars are off, remove the screws that hold the mounting plate from the support insert.What you'll be left seeing is a thin round plastic ring around the big hole in the drywall.Use your fingernails to pry this ring off the drywall just far out enough so you can get a hold of it with your finger tips. Slide both thumbs into the hole and get a grip on this ring with your index finger.Wriggling and pulling out toward you, pull this plastic ring and arms out toward you.Eventually, the arms will click along the tracks and you'll be able to get the ring attachment fully extended toward you about 2" or so.At this point, if you don't care about reusing these mounts, just use a pair of snippers to cut the plastic arms and the support mount will just fall into your wall.The arms are still attached to the bracing piece so now you'll need to slide a finger along the top of the hole in order to push the vertical bracing piece to a horizontal position.I used my index finger, but my husbands hands were too large so he had to use a long screwdriver.Once the bracing piece is horizontal, slide your finger straight along the bottom of the hole to keep that piece horizontal and guide it (and the plastic ring/arms) out through the drywall hole.
Trustpilot
3 days ago
5 days ago